
I. Screenrecording
- Launch QuickTime Player
- File (top) > New Screen Recording
- In the popup, choose “Record Entire Screen”
- Go to “Options”
- Timer (if you want a 5- or 10-second countdown at the beginning of the recording)
- Microphone > None
- Options > Remember Last Selection
- go to the screen you want to record
- Click the screen you want to record to start recording
- Click stop button on top menu to stop recording (2:35)
II. Audio recording (3:00)
- Download BlackHole
- Get a link via email
- Click BlackHole 2ch (channel), save to download and install
- search icon (top) > type “audio midi setup”
- audio devices box > + (bottom left corner) > Create Aggregate Device
- Click the name and change it to “Computer Audio Input” (4:05)
- On the right, select “BlackHole 2ch”
- hit “+” again > “Create Multi-Output Device”
- Rename it to “Headphones (for recording)” (4:25)
- Click “External headphones” and “BlackHole 2ch” (make sure to click “external headphones” first)
- or select “MacBook headphones” if you prefer (5:50)

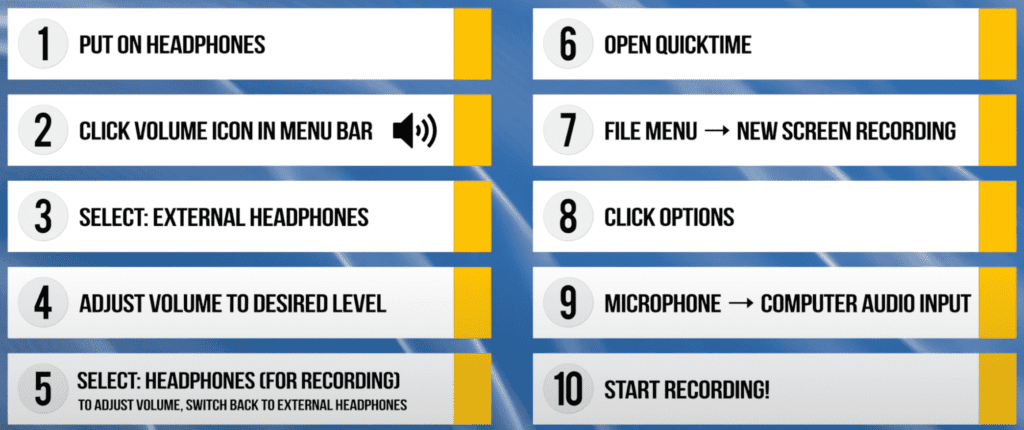
III. Combining video and audio
- put on the headphone
- select sound (top menu)
- select “external headphones” to adjust the volume on the volume bar on top if needed
- select “headphones (for recording)” (you cannot adjust the volume at this stage)
- Open QuickTime > File > New Screen Recording
- Go to Options (popup box) > Microphone > Computer Audio Input (6:00)
- Options > Record entire screen
- Play the video
- when done, hit “stop” icon on top
Screen record + your voice (easy!)
- Command + Shift + 5 (00:25)
- Select “Record entire screen” (00:45)
- If you don’t want to record any audio, select None under Microphone (1:40)
- You can also decide whether to show the cursor
- Click stop icon on top when done
5 Best FREE Screen Recorders - no watermarks or time limits
- simultaneous screen, camera & mic recording for Mac
- Pricing: $129/year, includes screen recording + video creation + editing tools bundle